Marian Hawke costume creation. Part 1

Not so long ago, I had a lot of free time, and I used the opportunity to replay some of my favorite old games, like the Dragon Age series.
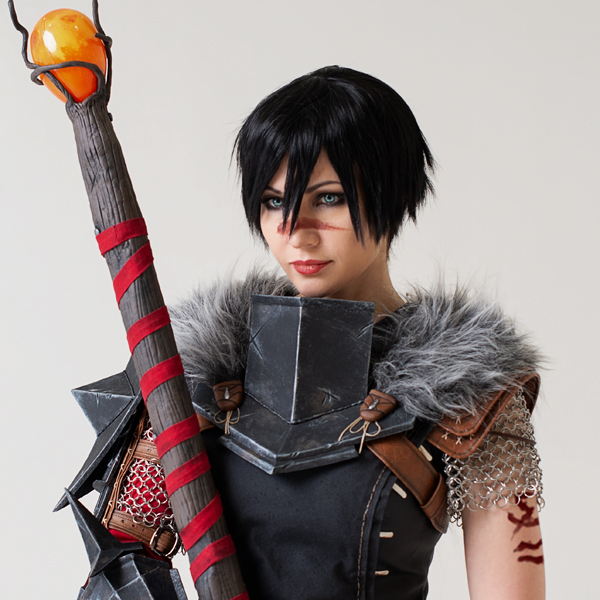
A moment of inspiration to create a costume and my love for a character aligned perfectly with Marian Hawke. She’s the most charismatic and charming character from the second game (though we won’t count Varric, right? He’s in a league of his own).
So, without much hesitation, I dove into making the costume.
Sewing
An interesting detail: I used two pieces of horrible fabric that somehow ended up in my closet. Honestly, I thought they were awful and never imagined I’d use them for anything.
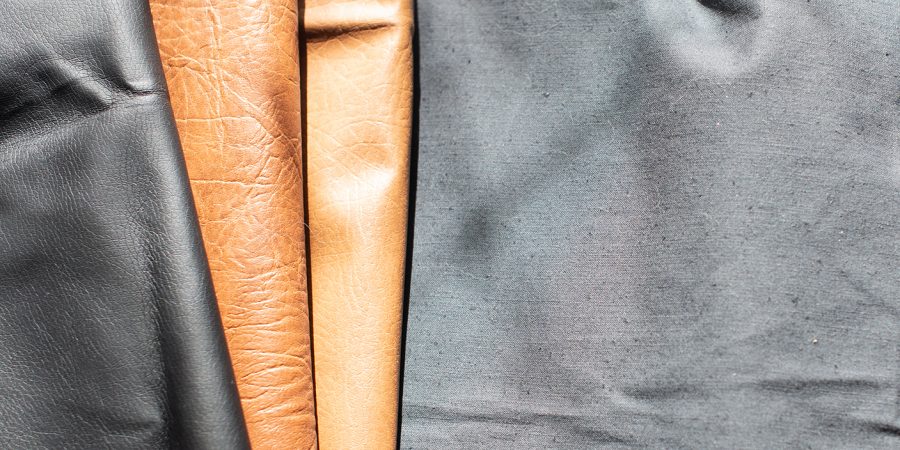
Just look at this hideous orange faux leather and the rough black fabric.
Then, I realized they were perfect materials for Hawke’s costume. Everything else came from costumes that I’ve been working on for a while (I have many of them in progress). I barely had to buy anything extra for Hawke; I already had most of it.
Alright, enough with the intro — let’s get into the actual process.
***
The Costume
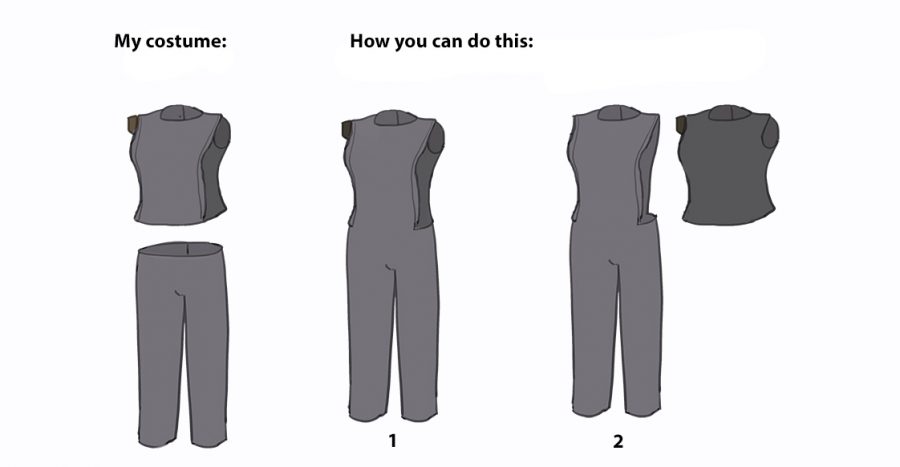
The costume consists of three sewn pieces: pants, a shirt, and a top (yes, I’ll call them that). The pants were made using a simple pattern with no special details. They’re a bit short because I had just enough fabric, but this is easily hidden by high boots. The zipper is sewn into the back, along the central seam. Since the fabric doesn’t stretch at all (not even by a millimeter in any direction) and the pants fit snugly, they’re not very comfortable to wear. Keep that in mind when choosing fabric for yourself.
The Shirt
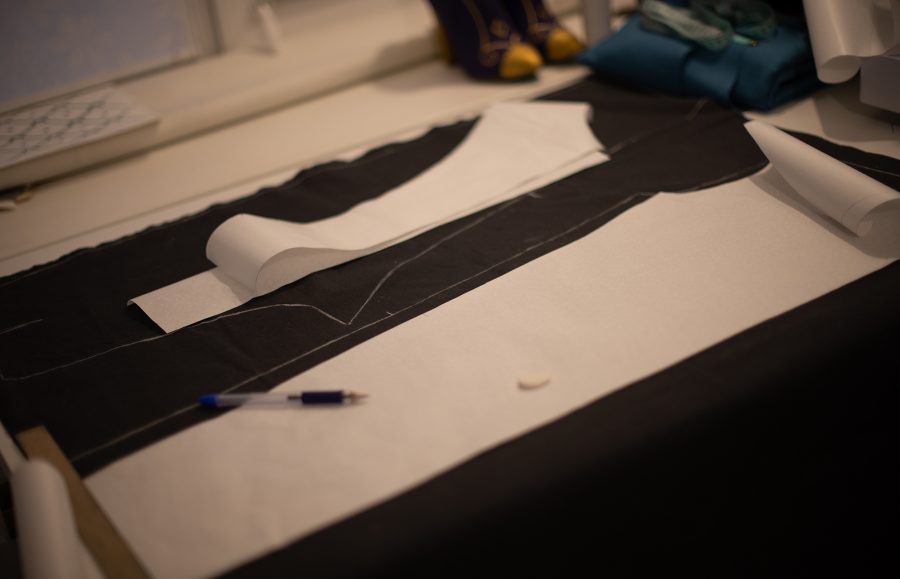
I created the shirt pattern by pinning draft fabric directly on a mannequin and drawing all the seam lines, then cutting it out and transferring it onto paper.
The front and back of the shirt are made from the same fabric as the pants, while the side panels are made from faux leather. The character’s outfit in the game also has different materials for these parts, which resemble an overalls-style top worn over a blouse. In hindsight, I’d recommend making it a full one-piece outfit, as I did, but sewing the shirt and pants together at the waist. That way, the shirt won’t come untucked from the pants, the pants won’t slide down, and the waistband will stay in place on your hips. Just something to think about.
The shirt has a narrow neckline, so I installed a separating zipper along the entire length of the back’s central seam. It’s very easy to put on (the pants’ zipper is also centered at the back, so sewing it wasn’t hard). Pay attention to the fabric edge when attaching it to the faux leather panels; I hemmed the edges in a specific way before stitching them together. I also added decorative stitching by hand using thick thread.
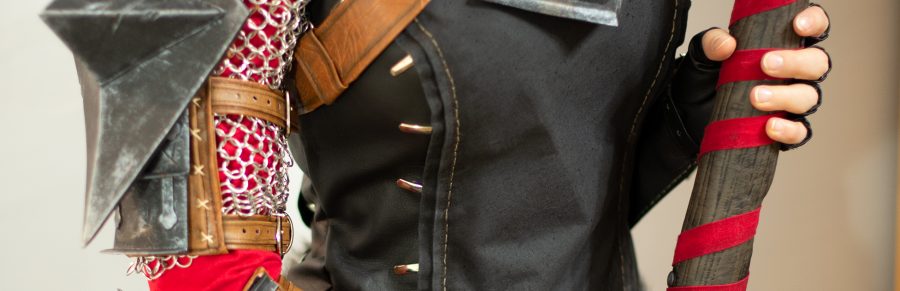
Those metal elements that look like they attach the overall-style top to the blouse are simple — I bought similar accessoriesat a store. They’re easy to install and look great.
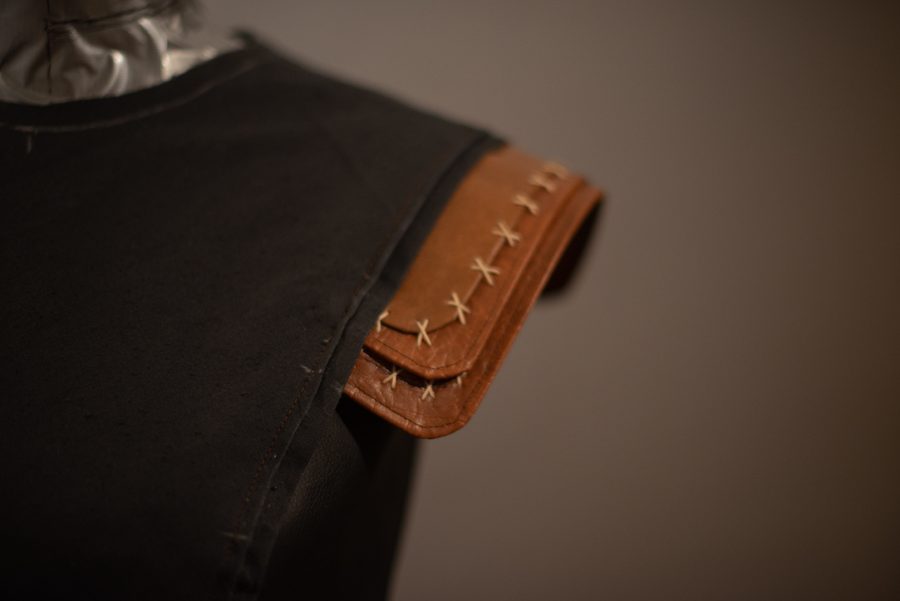
Lastly, the leather shoulder pad on the left side is sewn directly onto the shirt, emerging from the armhole.
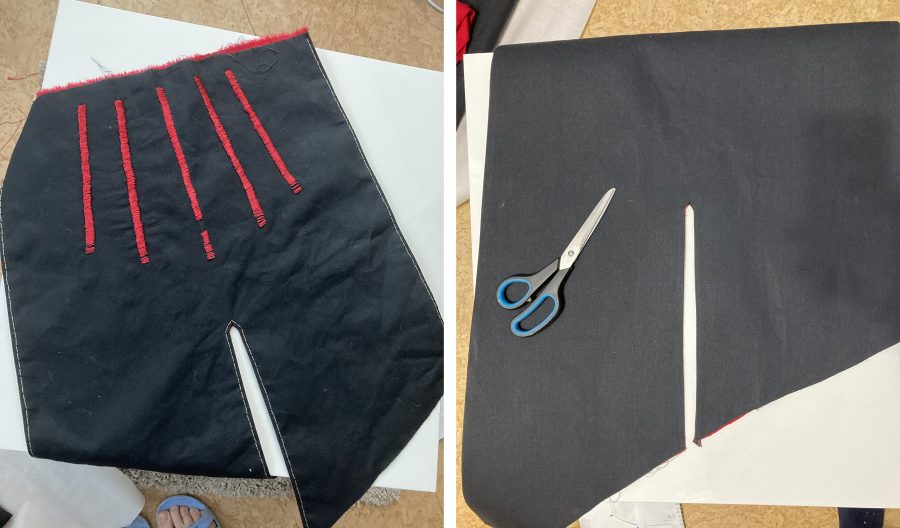
There are five red stripes embroidered on the back of the shirt.
The Top
The top had one main purpose: to take the weight of the chainmail off the shirt, so the two pieces could be worn separately. I made the base from black spandex, a very stretchy material that allows the top to be pulled over the head.

On the right side, I attached a full sleeve made from red linen (sacrificed from my Sera costume) with decorative hand stitching along the seam. The chainmail is attached to both sides (borrowed from an alternate Ciri costume). The left chainmail sleeve is slightly shorter than the right. The chainmail was woven using a standard, simple pattern from aluminum wire. On the left side, there’s a leather lace stitched on (whatever the artists intended it for).
Cloak… or something like that
Yes, it’s probably called a capelet, but I’m not quite sure =D
Hawke has a kind of half-cape on her back, which I sewed separately. It consists of two pieces: one red, one black, sewn together and then turned inside out. I chopped up the hem with scissors and painted it to give it a distressed look.
There’s also decorative hand stitching along the edge, as well as five red stripes that continue the decoration from the shirt. I embroidered them with thick thread and pressed them with a steam iron to prevent them from sticking up.
This piece is attached to the pants in my version, but you could also attach it to the shirt, or even sew it to an elastic band and wear it separately.
The Belt
Because the belt is quite wide, you can’t just cut a long strip of fabric and hope it fits well.
Due to the curve of the hips, the measurement of the top edge of the belt differs from the bottom edge. Using these two measurements, I created the pattern. It resulted in two long trapezoids.
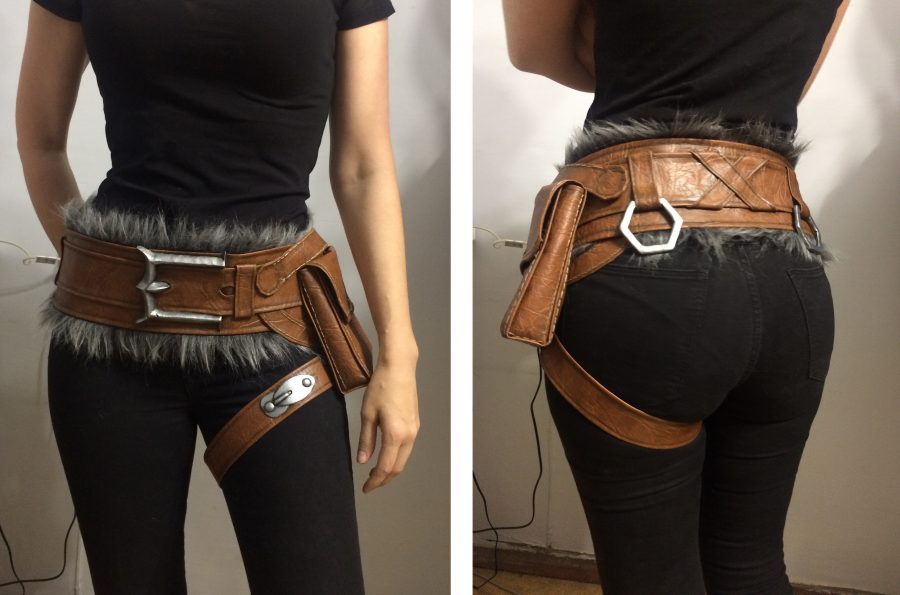
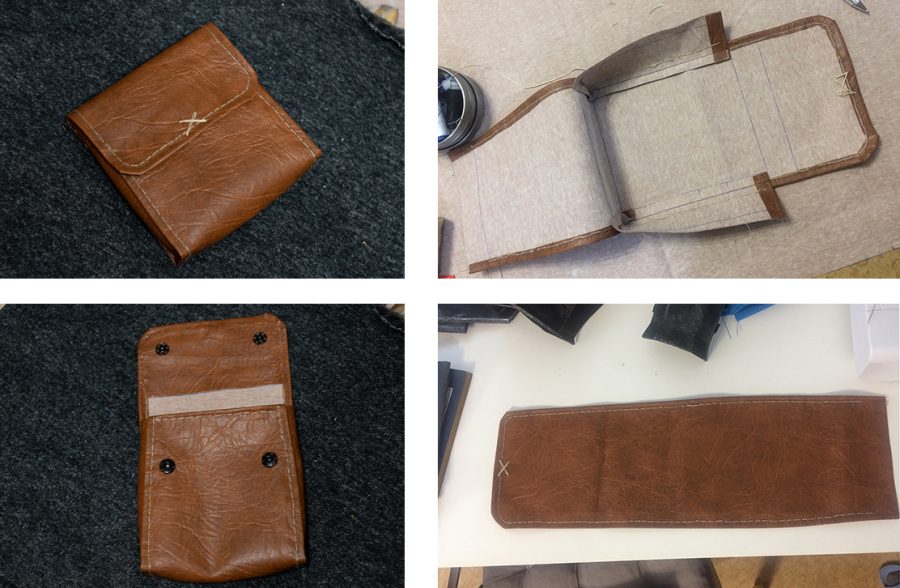
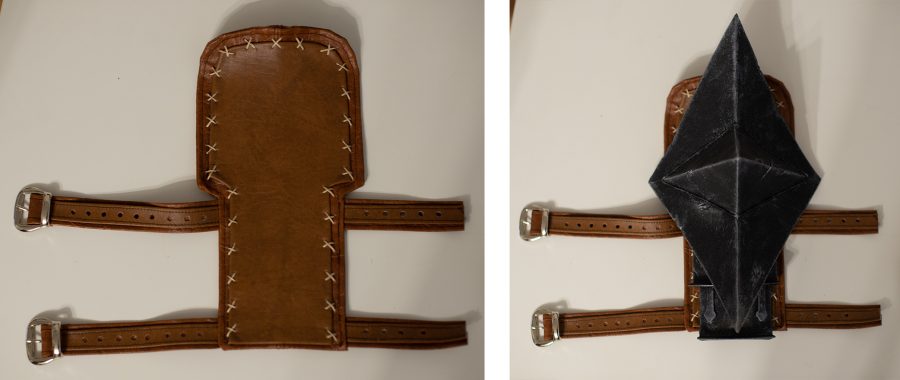
In the middle of this wide belt is a narrower belt. It’s purely decorative in my version and is sewn directly onto the base. In fact, all the details on this odd belt are purely decorative, except for the bag, which can actually be used.
All the leather loops are either sewn or glued to the base to avoid sticking out and to match the original look.
The large buckle on the belt is sculpted from worbla analog. It’s not functional, just glued in place. The prong is sculpted and attached to the buckle, with only the visible part created. If you make a full prong to close the belt, it’ll stick out awkwardly (in the game, the prong sinks neatly into the texture, but cosplayers have to deal with the real-world issues). My belt fastens with hooks on the side, hidden under the bag.
The bag is sewn onto one end of the belt, and it snaps onto the other end. There are also a couple of straps around it, sewn directly onto the belt.
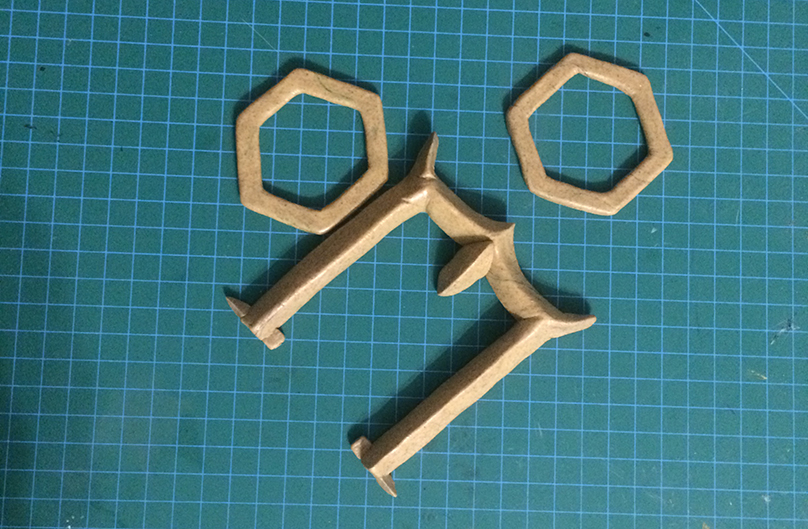
The metal “clasp” on the thigh strap and the rings at the back of the belt are also sculpted from worbla analog. By the way, I’m sure the rings were meant to be hexagonal, not round — this really fits the overall aesthetic of the costume.
Fur strips are sewn along the top and bottom edges of the belt. The fur is quite long, so I trimmed it with scissors until I got the look I wanted.
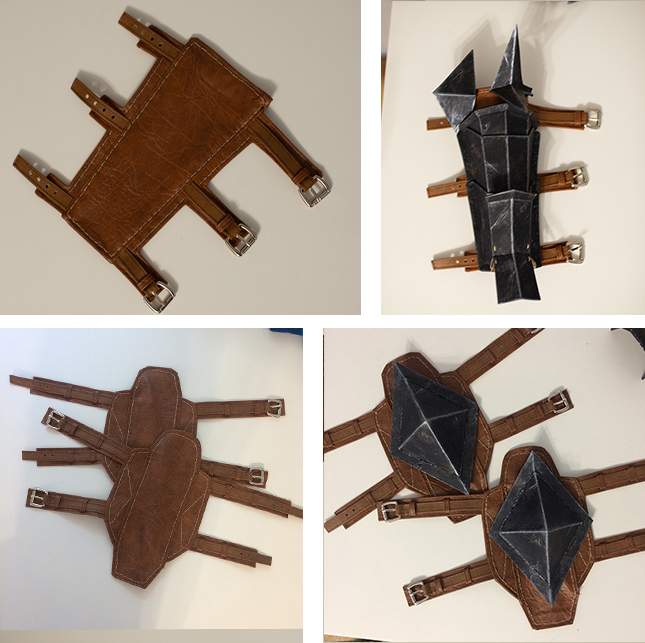
Leather Guards
In my experience, about 95% of the work on this costume went into these leather details.
They’re all made using the same technique: two layers of faux leather stitched together, with decorative hand stitching added. For the shoulder guards, I also glued a piece of faux leather in a different shade on top.
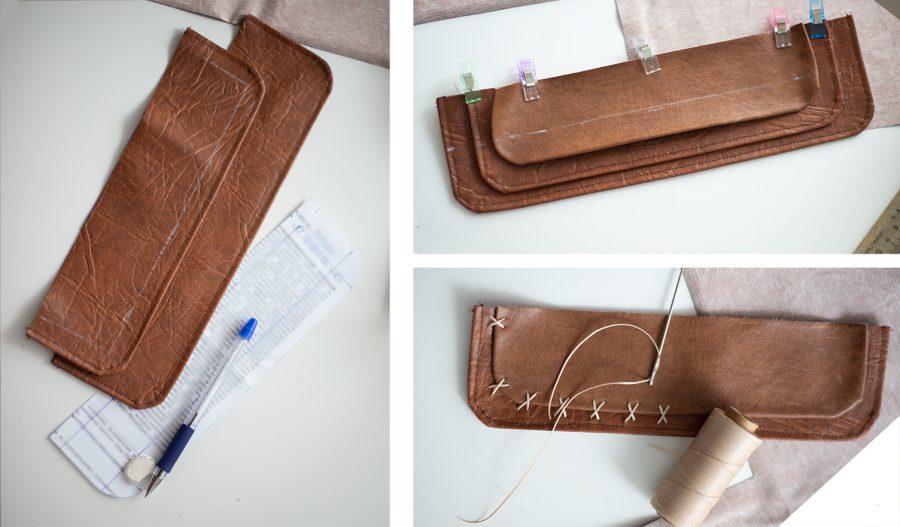
All the straps follow a unified style: wider at the bottom, narrower at the top.
When all the pieces were ready, I went over them with brown acrylic paint to add shading and give them more depth.
Part 2 Create Capelet, Gloves, Boots,Armor, Staff and Wig