Ysera grows the pauldrons
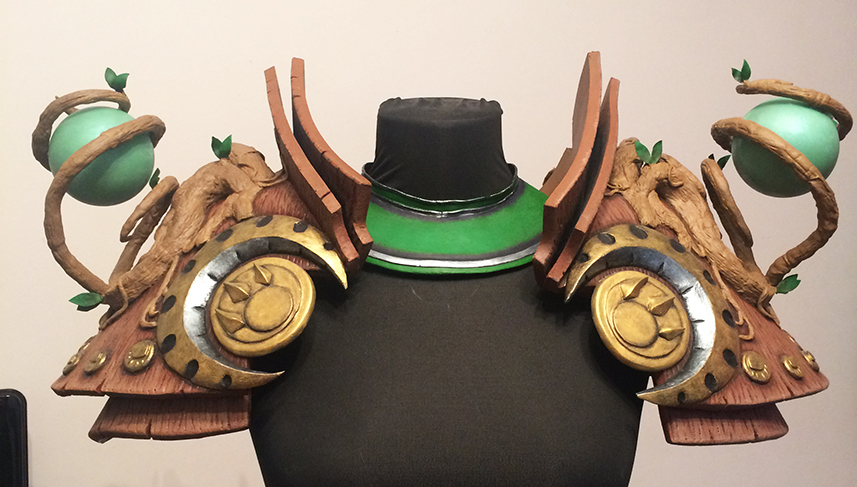
Any costume detail starts with a pattern. Or rather, with taking measurements and making sketches on paper. I have to be honest, it took me quite some time to figure out the size of the future pauldrons right off the bat. I had to rotate the 3D model multiple times to get a sense of how I should make them. What do you think was the core detail of the whole pattern? A crescent moon on top of the head! It’s of the same size as the ones on her pauldrons, so the first thing I did was cut 5 identical crescents out of Eva-foam.
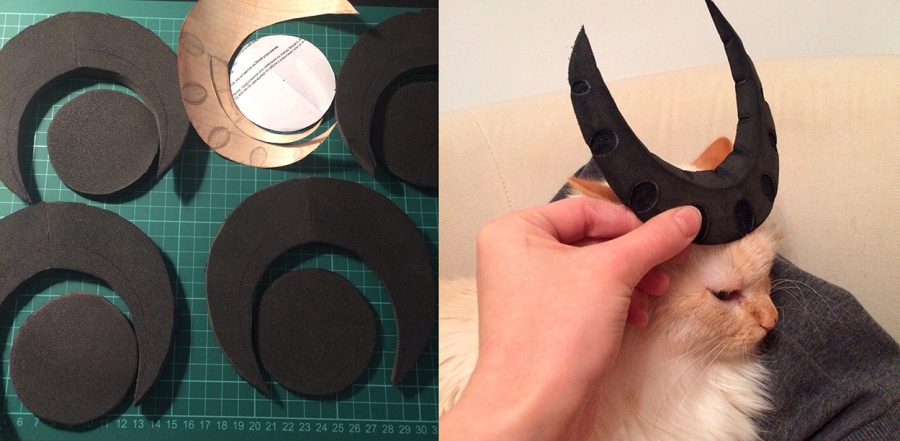
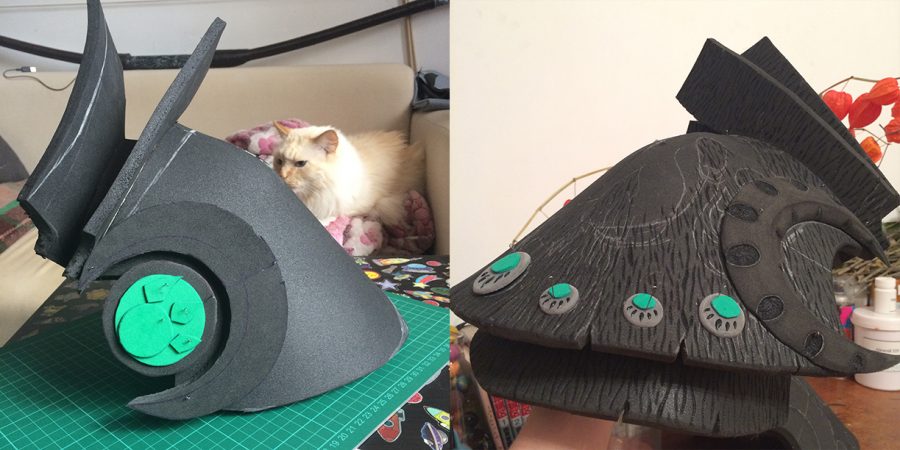
Next I made a pattern designed in such a way so as to fit the crescents on the front and back sides of the pauldrons with branches in between. Do not forget about the collar that runs in a semi-circle around the neck.
Having assembled the core pieces together, I used a soldering gun to make a texture that imitates the bark of a tree. Yes, it has a more flat and widely-spaced design in the game, but I like to introduce some personal touches and interpretations into my work. So I decided to go with a more realistic-looking wooden surface.
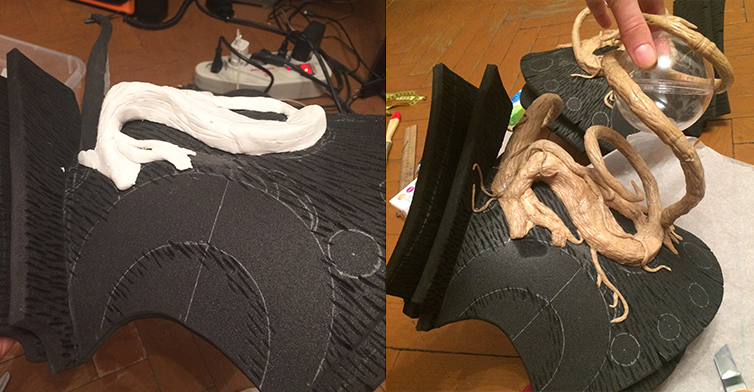
Now, moving on to the branches. The long ones were made of Eva-foam and the downmost arrangement was done using self-hardening modelling clay and wrapped in Bubblestar (a Russian alternative to Worbla). I also made the tree bark texture on the branches as well. The branches made of Eva-foam don’t congeal as you want them to, whereas Bubblestar-made branches can adjusted to any desired position.
I took a decorative plastic ball to get at least a rough idea of how the branch would entwine it. I didn’t wrap too tightly, the branch rather touches the ball slightly in certain spots. This essentialy helped create an illusion of weightlessness, as if the balls levitate between the rings. I used acrylic paints and nail varnish to paint the ball X) All in all, I made use of everything at my disposal that could add to the beautiful scintillating effect.
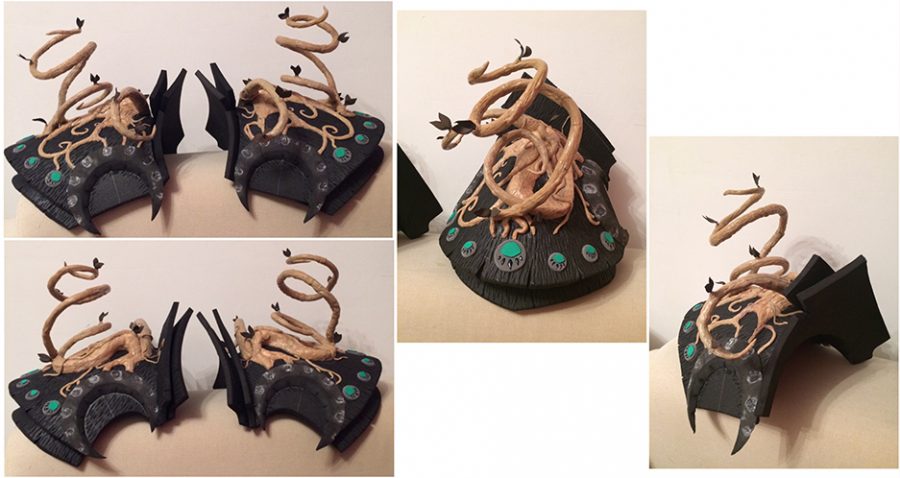
The leaves are made from 2-mm foamiran. I cut the circles from 5- and 3-mm Eva-foam. Ysera has a flat claws design on these details, whereas I wanted to go for something more predatory, as befits a dragon – so I made dimensional claws from self-hardening modelling clay on larger details and applied paint outliner on smaller details.
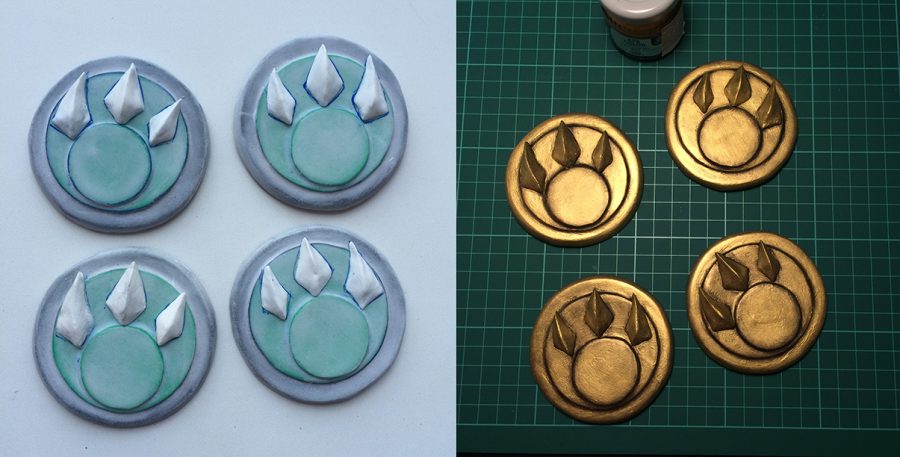
The pauldrons were painted with acrylic paints. My advice to you would be to paint all the details at once or note down the colours that you use in their consecutive order, or it may easily slip out of your mind=) When everything was done, I didn’t put a layer of varnish over the detail as usual. Any type of varnish, even the matte one, adds a certain shine to the workpiece, but wood doesn’t shine so I decided to dismiss this stage of the process altogether.
And last but not least – fastening. The pauldrons are very light, so they can be fixed to the neck workpiece with a Velcro. Tight as a tick!
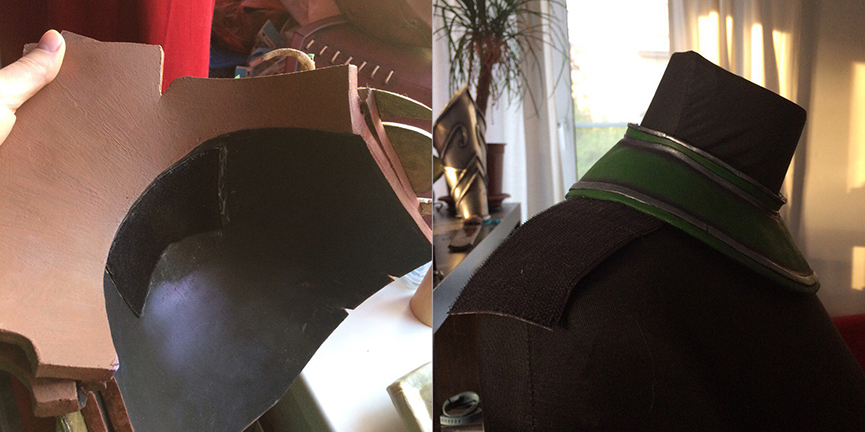
I had great fun creating this workpiece, I like working out in fine detail.


