Lord Admiral Jaina Proudmoore costume creation. Part 1
Strange as it may seem, Jaina is the only WoW character I really vibe with – and yet, until very recently, it hadn’t crossed my mind to cosplay her (or rather, I just haven’t gotten round to it yet: to many cool cosplays, too little time! And then there is Tyrande =). It all changed when Battle for Azeroth, Wow’s expansion, came out where Jaina was sporting a new costume. “THIS is what I will do”, I thought the moment I laid my eyes on it.
To think of all the hassle I had to go through to get it done on time, and all the do-overs that followed… it was crazy! But let’s, however, get to the good part – the process.
Materials
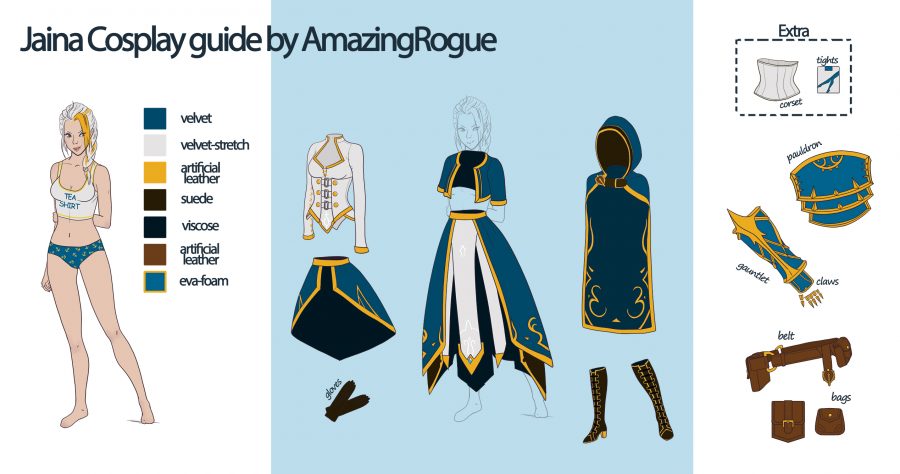
All blue pieces of the costume are made of medium-weight velvet, which is sturdy enough to hold its shape but at the same time breathable and doesn’t weigh the costume down.
One thing to remember when using velvet is that all pieces (that is, the entire costume) must be cut with the nap facing the same direction – otherwise, it may create an apparent visual color difference.
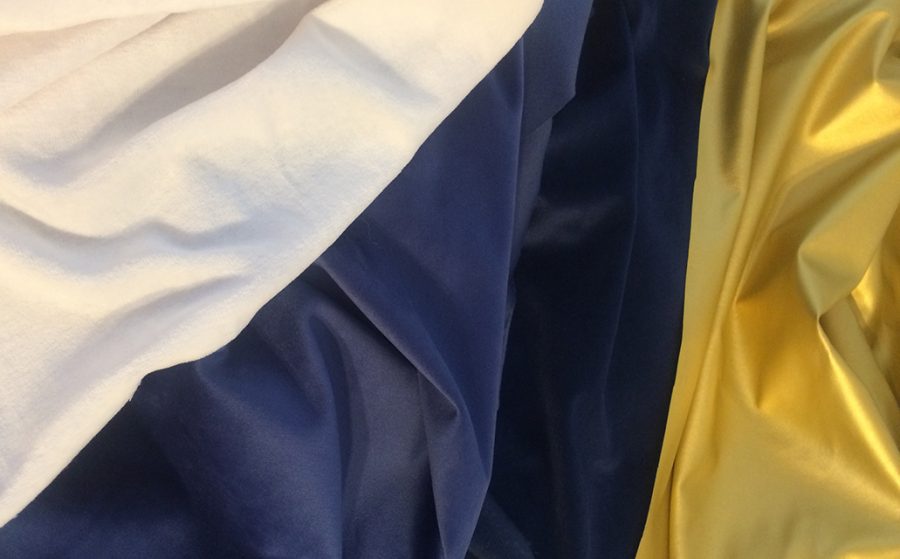
All black pieces are made of suede.
The lining is made of fine black cotton and dark blue viscose.
I strongly advise to wash the viscose before you do anything with it as it shrinks after washing and it’s always better to be on the safe side than to discover that your finished pieces run too small because they’ve shrunk.
White pieces are made of stretch velvet. I used white biflex for the lining of the blouse and thick white knit fabric for the skirt.
Golden and brown parts are made of artificial leather.
Metal
All costume pieces feature ample golden decoration, so let’s start off with that. In the game, it seems like these decorative details are made of metal – dimensional in shape, with scuff marks and abrasions here and there. But of course it’s not metal, real metal doesn’t flap about or fold or bend like fabric.
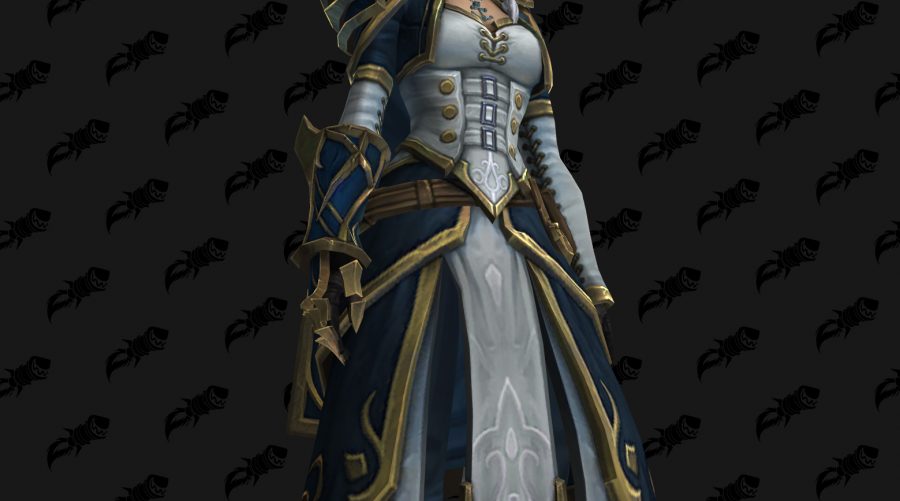
This technique is used in virtually every second costume in the game, and cosplayers have long come up with ways to work around it, for instance, by using faux leather reinforced with EVA foam on the inside, which gives a dimensional look to the piece. This is the technique I’ve used to make my jacket.
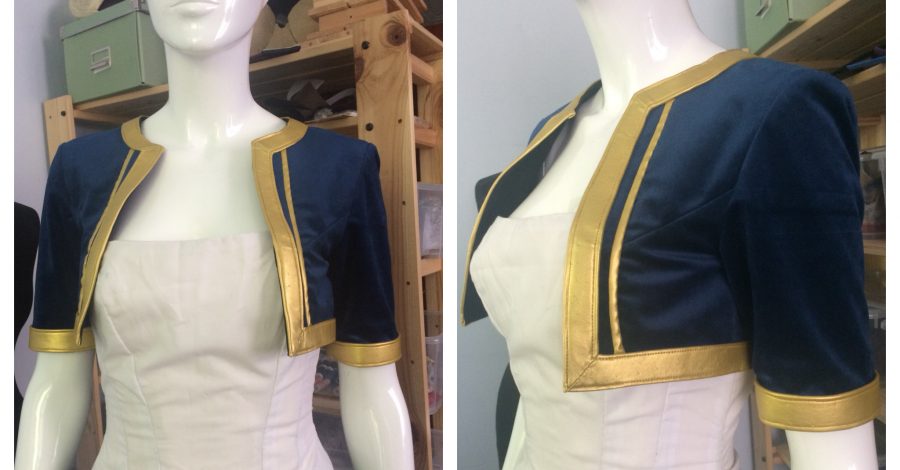
In the process I realized, however, that this approach wasn’t working well for me. All main pieces had already been cut by then, and I knew what kind of end result I was aiming for. Because of the foam, the costume felt way too rigid and cumbersome, whereas I’d always imagined it as flowing and light – well, at least to the extent the materials and the design allowed.
Okay, I thought, no more foam. And then there was another complication: I had a piece of excellent artificial leather of just the right color, but the problem was that it was too thin. It would bulge and warp out of shape and crumple on the surface.
My fix to the problem was to reinforce all pieces with faux leather upholstery fabric. It is sufficiently rigid, holds its shape well, flexible but doesn’t stretch, doesn’t make the piece look too cumbersome and at the same time it’s texturized enough to give the piece some dimension, make it stand out against the background. For me, it proved to be the best option. Keep in mind, however, that all these technicalities are a matter of personal preference. You may wish to go for a different approach.
Now, the step-by-step procedure in more detail. First, I cut out my pattern pieces on faux leather upholstery fabric – make sure you follow the pattern as closely as possible. Then I drafted the piece over onto the golden leather and added seam allowances. After that, I glued the thick and the thin pieces together and, finally, cut the entire thing out of the golden faux leather. Do not forget about the seam allowances around the perimeter!
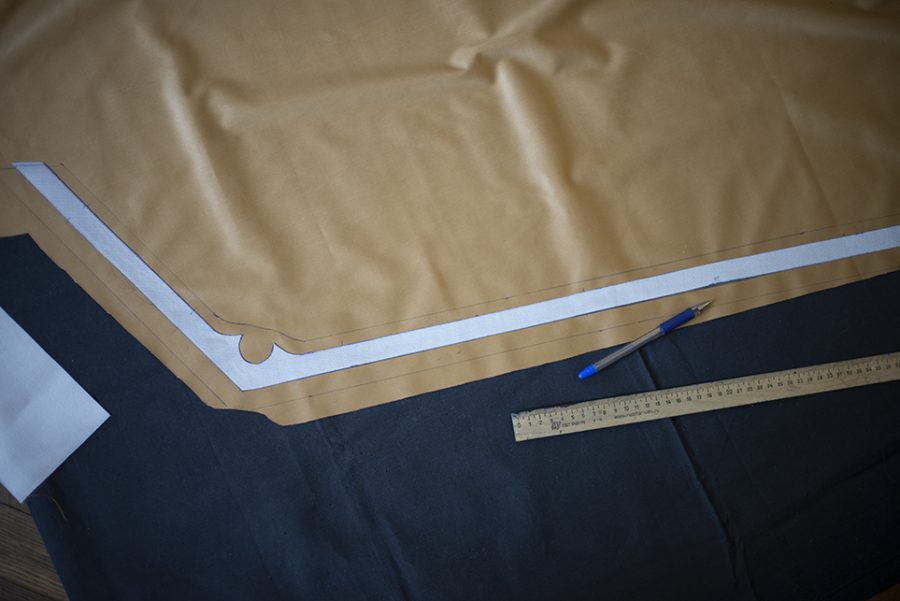
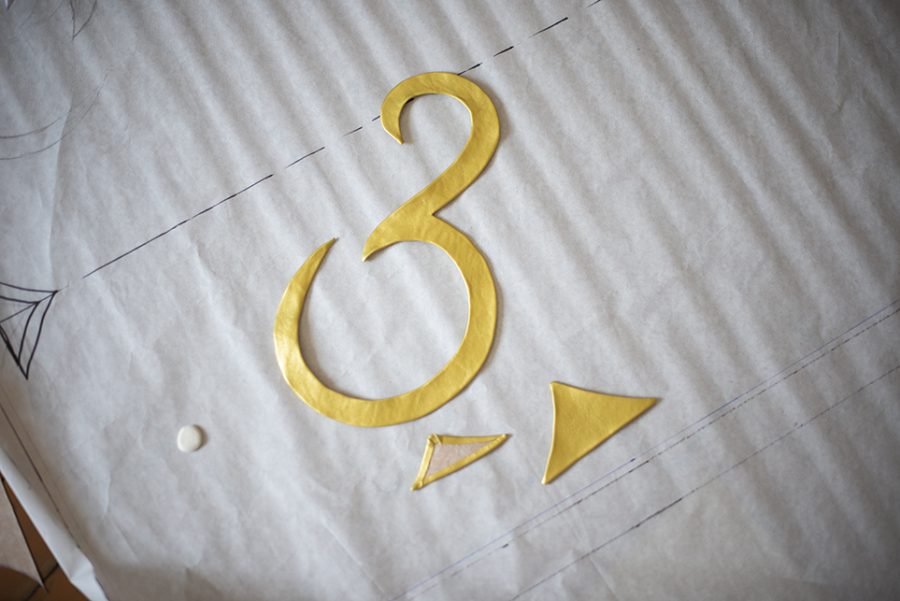
On one side, the seam margin was glued to the underlay – that is, the upholstery leather. Then I carefully placed the piece onto the base material (the material it would be sewn to) while at the same time folding the margin on the other side, which covered the base material, using sewing clips to keep everything in place in the process. Once I’d made sure the piece was fitted as it should be, I used a sewing machine to stitch its glued edge to the base material. After that, you can easily stitch the outer edge, removing the sewing clips carefully as you do.
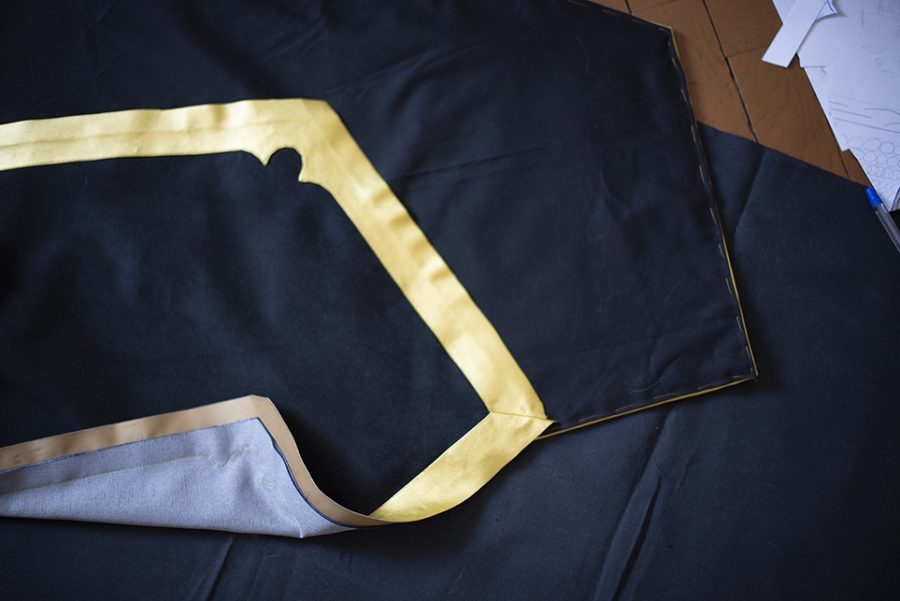
I understand the description may sound somewhat confusing, but once you try it yourself, things will start making perfect sense =)
If you baste your pieces, make sure you use thin needles and, preferably, silk thread, to leave as little trace on the leather as possible (some markings will be visible anyway).
Jacket
The pattern can be downloaded here. The sizing is S/M, scale 100%. Measurements: chest – 92 cm, waist – 63 cm (height – 173 cm).
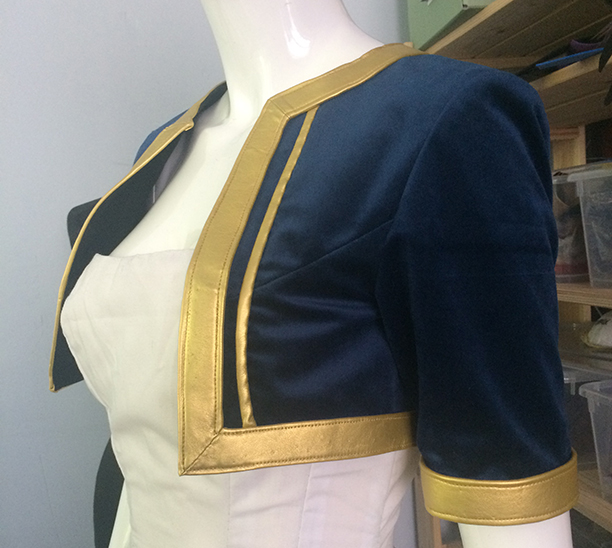
Please note that all my patterns are based on my own body measurement and might therefore require sizing adjustments to ensure a good fit. I always start with making a mock-up of the future piece using some scrap fabric to check whether it requires sizing up or down. This is something I recommend to do, unless you are already a pro.
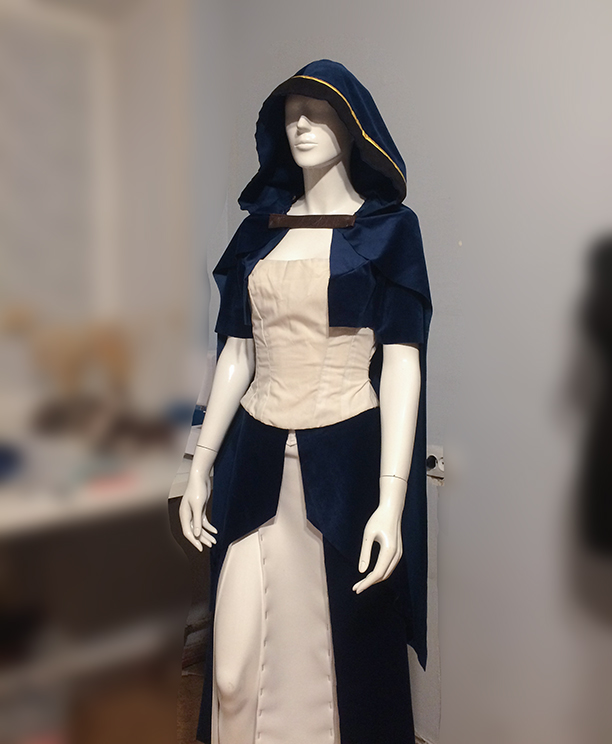
I never try to make an exact replica of a character’s costume – it’s a losing game, because in reality the physical properties of materials are quite different and you play by the real world rules, not the fantasy world rules. Still, sometimes it so happens that it’s an exact match, Jaina’s jacket is one such example. Even the seams on the back are a faithful copy of its virtual prototype.
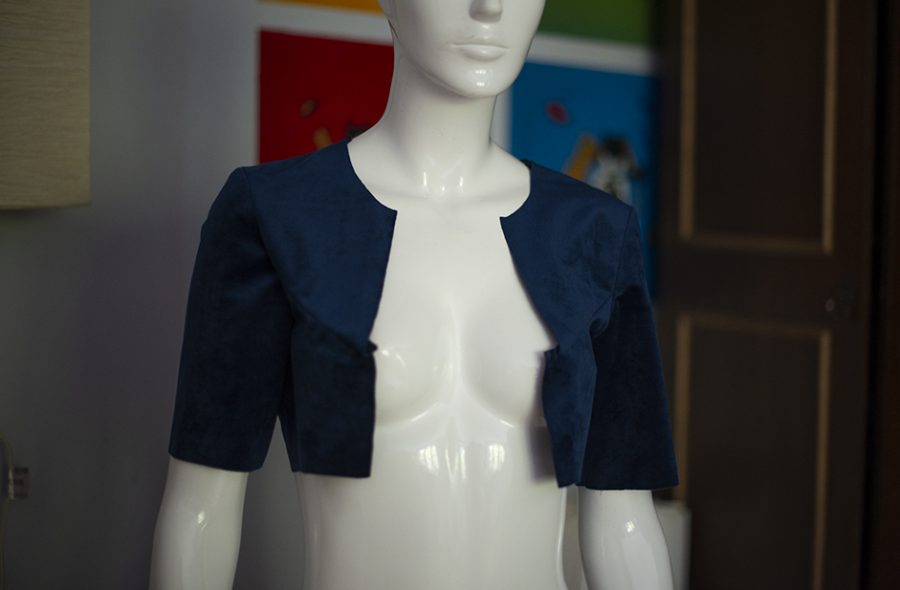
The pattern is relatively simple and no special explanation is required. First, I made a jacket from velvet and then another one from black cotton, the latter served as lining. Then I put one into the other, stitched them together and trimmed with gold decorations.
Blouse
Choosing the right fabric is very important. I used stretch velvet for the blouse itself and biflex for the lining, both fabrics are conveniently stretchy (please note that my pattern is designed for this particular type of fabric). Even so, it took a lot of adjustments to make it fit like a glove.
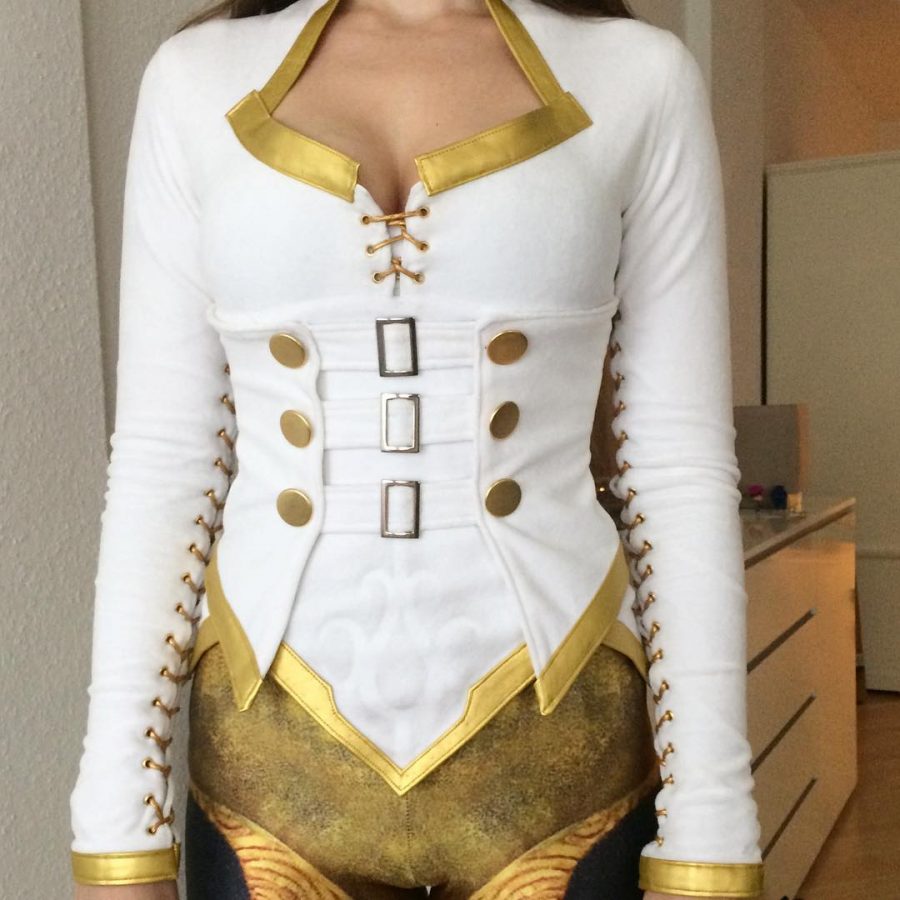
You can use a thicker fabric and dispense with the lining, it’s all optional. I’m just sharing my method and my techniques of creating the costume.
The first thing I did was cut out the sleeves. Then I trimmed the sides (they are now sewn together but laced).
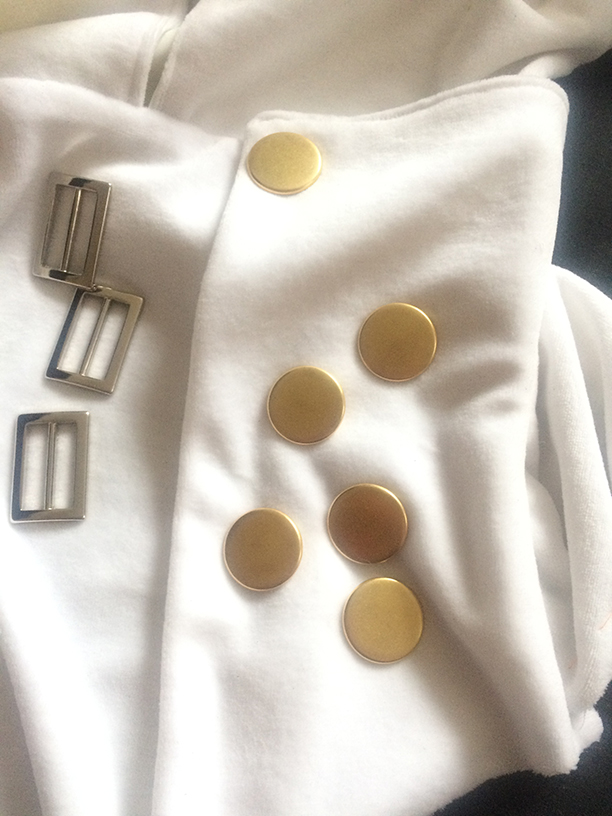
I put together the remaining pieces of the blouse and sewed the sleeves on. On the sleeves, I ran a neat basting stitch along the sides so that they wouldn’t get misaligned and I could install the grommets evenly on each side.
I installed the grommets from top down to make sure everything fits perfectly. Finally, I attached the faux leather “bracelets” – it’s the only part of the sleeve where it comes together in a circle. Now the stitching can be safely removed and the lacing put into place.
There’s a back zipper that makes for easy-on, easy-off, while keeping a tight snuggly fit around the waist. The design pattern is applied onto the central part before sewing.
Skirt
Here, it’s all pretty plain and simple. I sewed all pieces separately. First, I trimmed each piece with the ornament and then attached the lining making sure everything is neat on the inside as well.
Up next was the belt that fastens in the back, onto which I sewed all the pieces, except for the outer semiskirt, while trying the whole thing on every time to make sure it fits well. The rear white piece was only attached to the belt halfway, the other half being fastened with a pin – otherwise you won’t be able to put the skirt on. As an option, you can sew it onto an elastic band and wear as a separate piece.
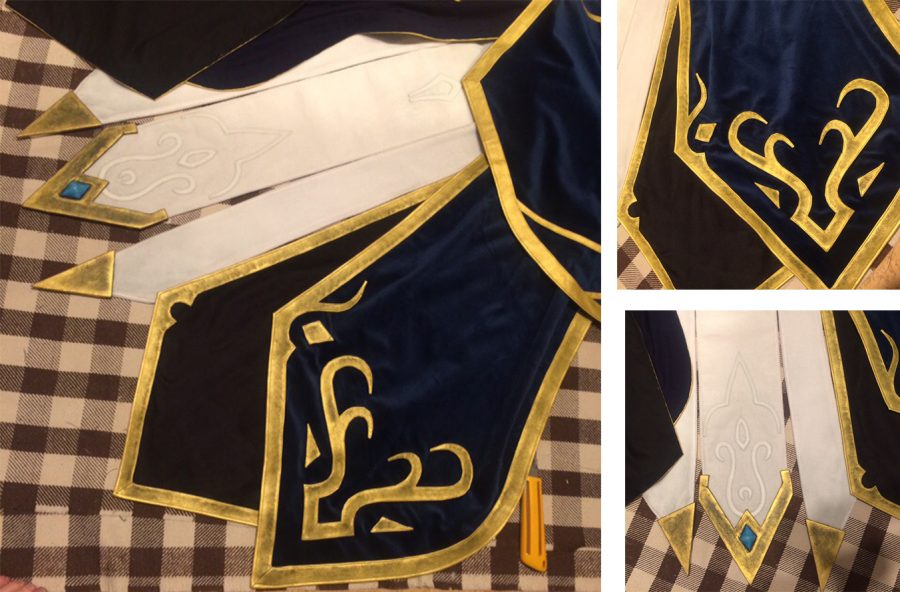
The outer semiskirt has a fastener at the front: for that you can use a zipper, hooks, Velcro, snap fasteners, whatever you fancy.
One more thing: the top of the skirt should sit on your waist, not your hips, otherwise all the volume will be lost. Also, I used a corset to make the waistline more pronounced, it can really make a big difference in the way the entire look comes together.
The “metal” ornaments that decorate the white skirt pieces are made from Eva foam covered with worbla analog (optional) and glued onto the fabric with adhesive.
For the blue stone, you can use Worbla’s Crystal Art mixed with acrylic paint.
Coat
The tutorial has been published earlier and can be found here.
Decorative elements
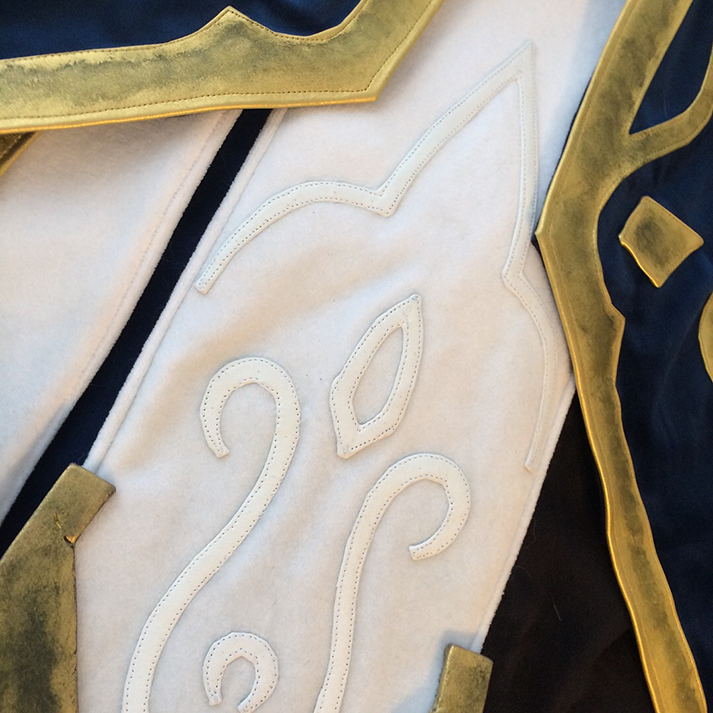
Both the golden and white designs were done in the same way: faux leather upholstery fabric overlaid with thin faux leather. The finished pattern is then sewn onto the respective piece.
Special effects
I used an airbrush to add some shade – turquoise and a tinge or black – to the white pieces.
The golden elements were aged with the use of a sponge. To me, the metal in the character’s costume seems to resemble weathered brass so I had to fiddle about with paints for a while to get the “patina” look I needed.
I used natural umber, emerald green and blue. Same colors were used for the armor.
On the other hand, I quite like the way the costume looks without any aging, too, with clean bright colors on both the garments and the armor.
PART 2 Create bags, belt, boots and armor with the staff


