Marian Hawke costume creation. Part 2
Part 1 Create Shirt, Top, Cloak, Belt, Leather Guards

The Capelet
On Hawke’s shoulders, there’s a piece of wolf fur, with a leather layer underneath. This part was very simple to make: I drew the pattern, cut out the pieces, and didn’t even bother finishing the edges.
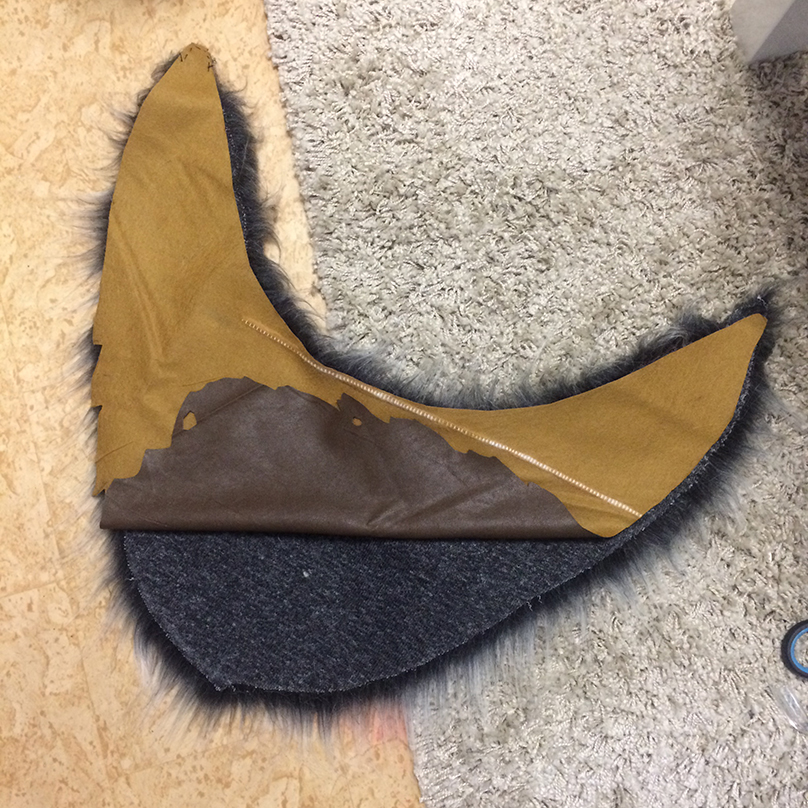
I sewed the pieces together at the tips, and glued them to eva-foam, which I had carved a pattern into, then covered with worbla analog. I added a little drop-shaped detail with contour paste on top.
At first, I wanted to make the brown tips fully functional closures that would attach to the chest plate with snaps. But I decided against it. Instead, they’re glued to the chest plate, with waxed thread underneath to imitate the lace-up look from the original design.
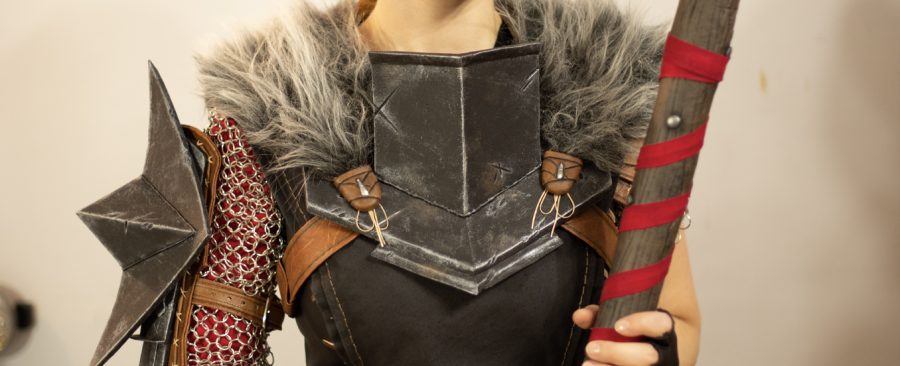
By the way, the straps are only attached to the shirt. In the back, they’re sewn under the fabric piece of the shirt, while in the front, they’re sewn onto the chest. They end with Velcro, where the chest plate with the capelet is attached.
The strap isn’t just a straight ribbon—it has a curve around the side, so there’s a seam there.
Gloves
On the right hand, Hawke wears a regular glove (I sacrificed one from a Malfurion costume, and it fit my hand perfectly—he’d probably be okay with it! XD). It’s brown, and it seems like the leather guard on the right arm is an extension of the glove. I found it more convenient to make them separate pieces.
The claws are glued directly onto the glove, and surprisingly, the flexibility is excellent—you can bend your fingers any way you like.
The glove on the left hand is black and fingerless. The top of the glove ends in a wide flared cuff with a slit along the back seam. There’s decorative hand stitching, along with a strap and metal rivets.
For both gloves, I used my go-to universal pattern with minor adjustments. You can find and download it on my website.
Boots
These were initially bought for Shandris, but they ended up being perfect for Hawke!
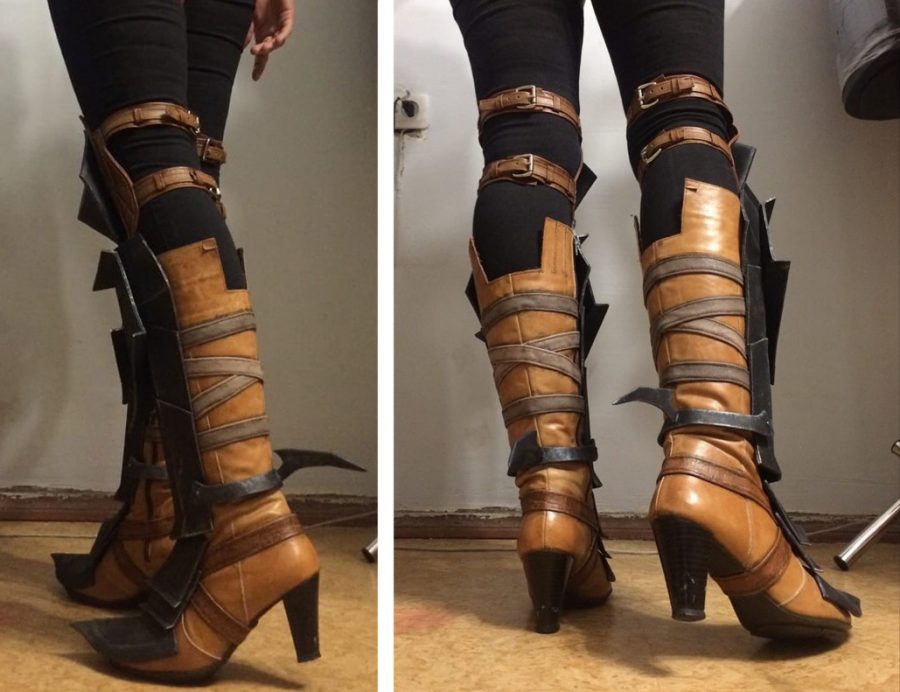
At the back, I cut small pieces out in the shape of an inverted trapezoid and hemmed the edges.
All the straps are glued directly to the boots. On the side with the zipper, they end with Velcro, which attaches to a large strip of Velcro down the center of the boot, hidden under the armor plate (which also attaches to this Velcro strip).
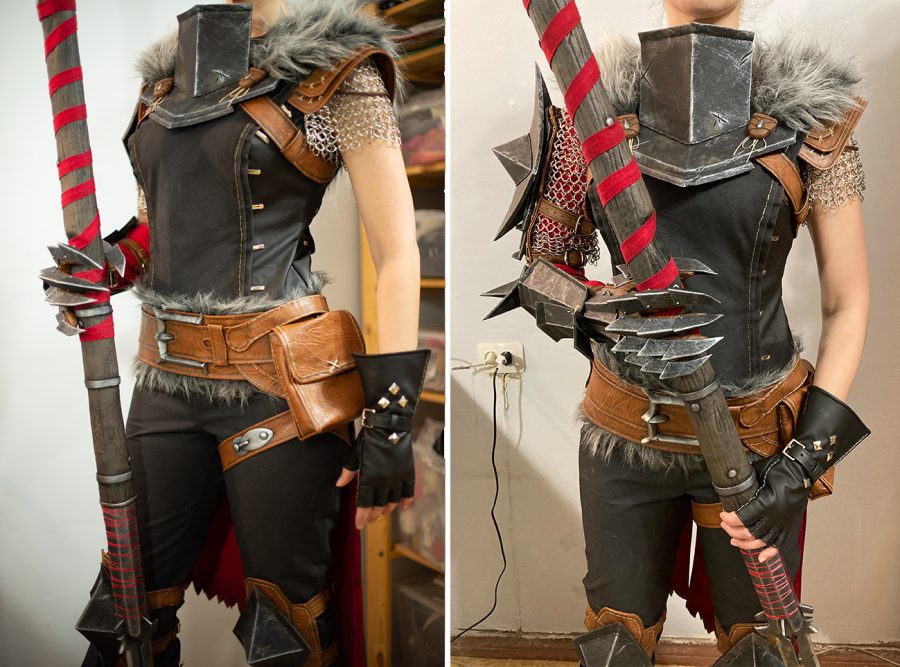
Armor
The most important rule when making armor for this costume is to remember that almost all of it is made up of different connected planes. Only the guards on the feet and shoulders are slightly curved.
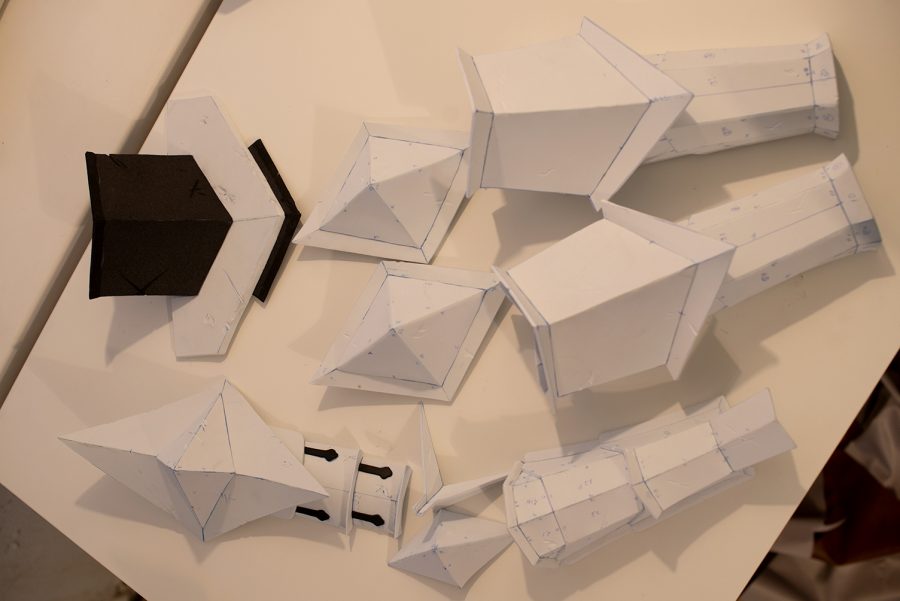
I used EVA foam, 3mm thick, with a density of 70 Shore hardness for almost all of the pieces.
For extra durability, I reinforced the seams from the inside with a line of hot glue, creating an additional frame. But honestly, even without this, the pieces held their shape well.
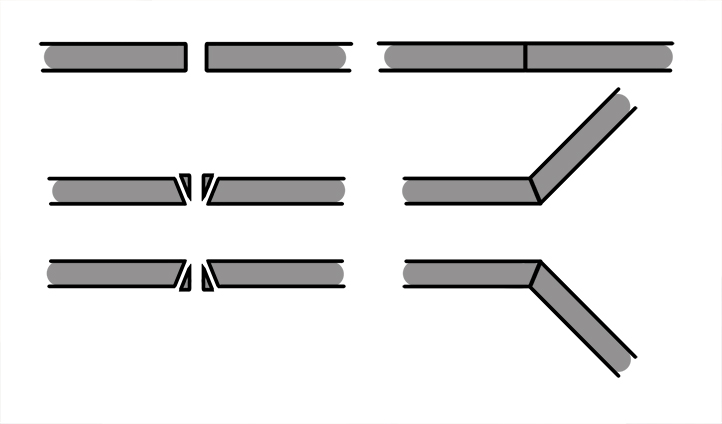
To achieve sharp edges, I used the technique shown in the image above: I shaved off a small angle along the edge of the piece, so the joint would be angled. If you shave the outer edge, the piece will curve outward (for example, the piece on Hawke’s elbow).
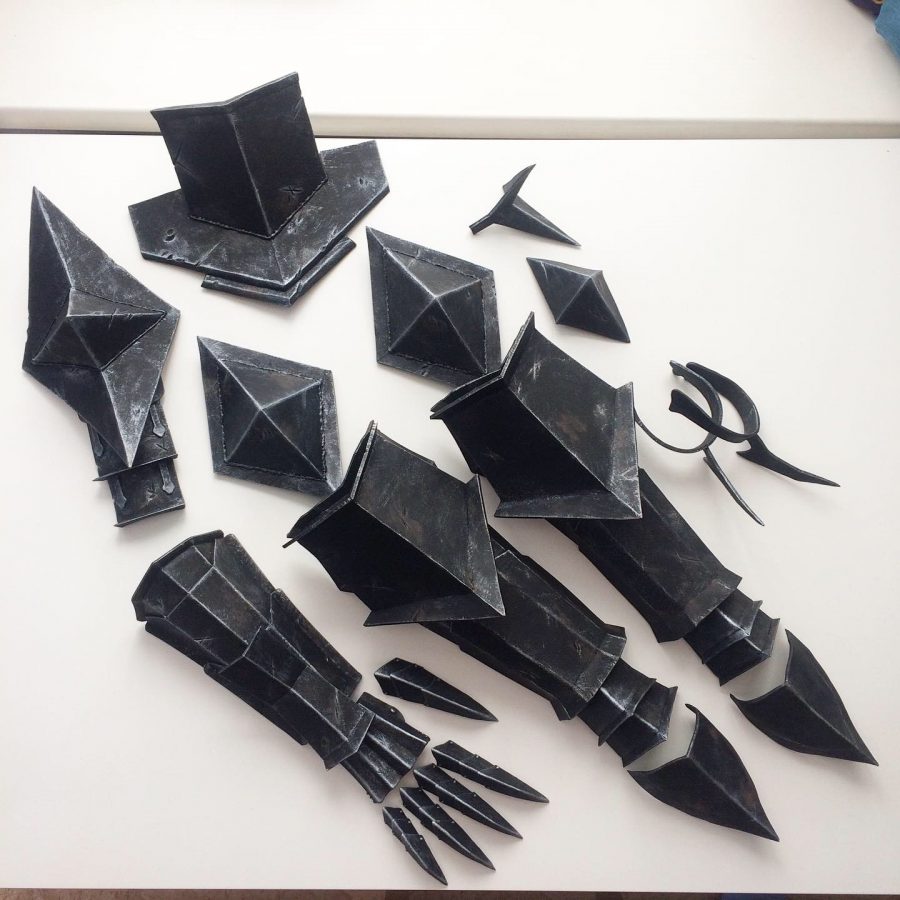
On some of the seams, there’s a rough line that looks like a welding seam—I imitated this using hot glue.
Everything was hand-painted using the dry-brush technique.
All the pieces are attached to the costume with Velcro. The fingers, however, were glued directly onto the glove using cyanoacrylate glue.
Here’s a small tip for the shin guards: make all the foot armor pieces first and attach them to the boots so you can determine their height, then make the shin guards, specifically the lowest part, so they don’t interfere with walking or conflict with the foot guards. After that, attach the spurs.
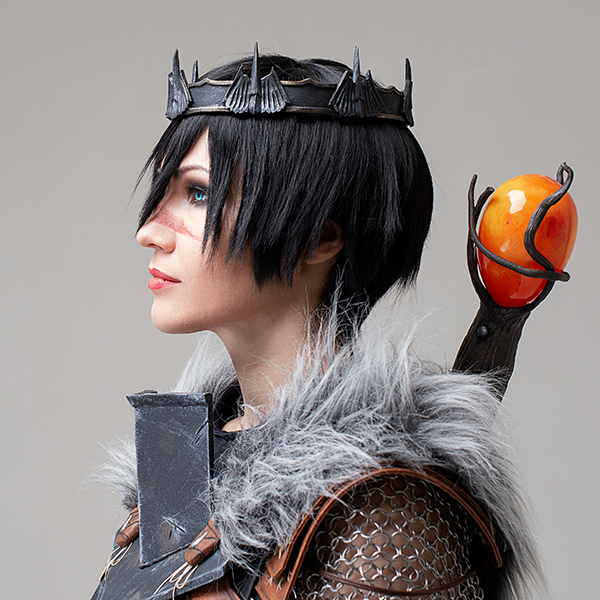
Staff
The lower “metal” part was made from PVC and EVA foam and wrapped in worbla analog. The upper “wooden” part was carved from polystyrene foam and covered with worbla analog. The orb was made from a decorative egg-shaped sphere, which I lightly sanded from the inside and painted with acrylic paint. If you want, you can even add lighting inside the sphere (I didn’t feel like it).
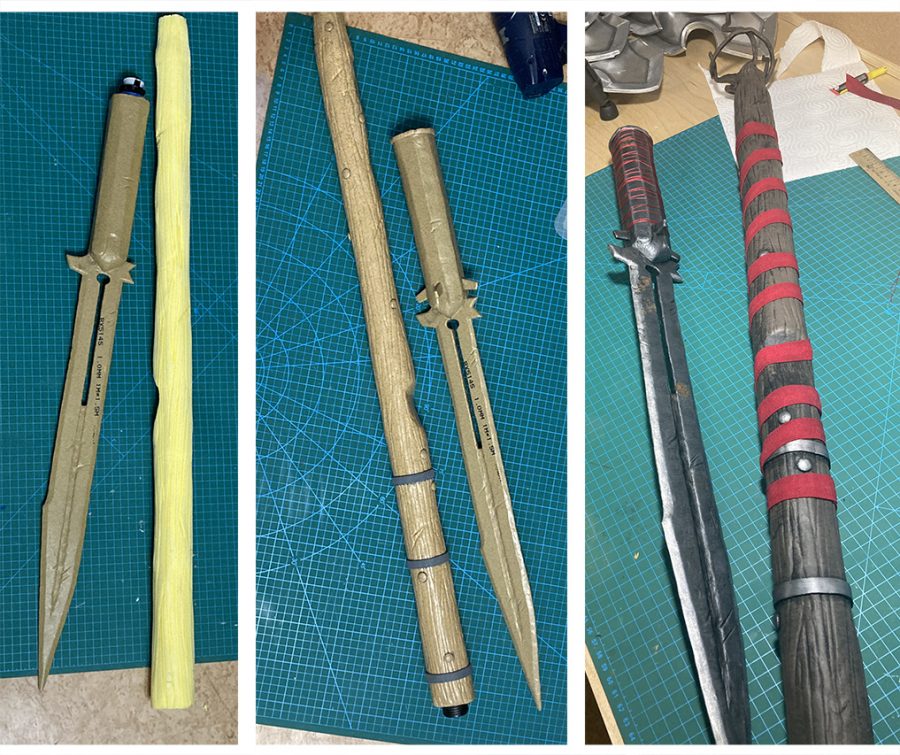
As you can see, the staff is collapsible. To connect the parts, I used a fitting like this:
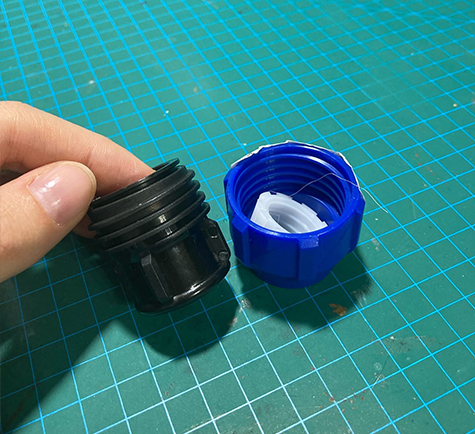
You can find it in the plumbing section of a hardware store; it comes in various sizes and is called a “cap” or “coupling” depending on the configuration. It’s a great thing, and I recommend it.
Wig
I ordered the wig from AliExpress, looking for one with a short cut right away.
Of course, there wasn’t a perfect one, so I had to customize it myself =) I trimmed some strands and styled others with hairspray. By the way! I used a flat iron to make the hair as straight as possible, eliminating any extra volume.
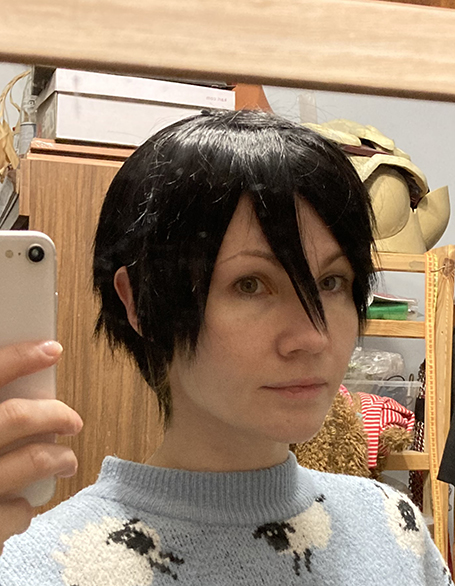
I wanted to avoid the “helmet” effect, especially since Hawke’s own hair is quite modest. So, I spent a lot of time with thinning scissors, cutting away excess volume all around the wig.
At the same time, I wanted to keep some natural messiness. In the end, I’m happy with the wig. And with the whole costume in general =)
You can see finished photos of me in this look here.
Also you can buy patterns for Hawke armor or even order the full costume. Just send me a message on ARogue.Cosplay@gmail.com
All items im my store you can watch here.